Want to record your own podcast?
Then you’re going to need some podcast equipment.
Now, when people start podcasting, many of them fall into one of two camps:
- Some people take waaay too much time deciding what podcast equipment to buy
- And others buy their gear on a whim without doing enough research beforehand
The downside to #1 is that you waste too much time researching when you should be taking action—actually recording your show and putting it out there in the world.
But you don’t want to go too far in the other direction. Because the downside to #2 is that you could buy the wrong thing—maybe you get a microphone that doesn’t really work for your needs—and you end up either wasting money, producing low-quality audio, or both.
It’s my hope that this post will solve both of those problems.
If you don’t know me, I’m the guy behind the scenes who does all the editing for the Perpetual Traffic podcast.

So needless to say, I’ve got quite a bit of experience in podcasting. I’ve also used a lot of different audio equipment over the years—some of it really good, some of it not so good.
And in this article, you’re going to get the benefit of my experience. You’re going to learn exactly what pieces of podcast equipment you need to record your own high-quality podcast. It doesn’t matter if you’re setting up a professional-level studio or getting started on a shoestring budget.
I’ll help you find tools that fit your needs and your budget, so you can rest assured you’re using the right equipment for what you’re actually doing.
What Type of Podcast Are You Recording?
When creating a podcast studio, there’s one big question you need to think about:
What is going to do the best job of capturing my content and the chemistry of my host(s) and/or guest(s)?
And the truth is that there’s no one right answer to that question. The answer is going to vary from podcast to podcast.
The equipment you choose for your studio should depend on the type of podcast you’re producing.
Part of the reason why? Because there are many different types of podcasts out there:
- Traditional podcast
- Interviews
- Case studies/reporting
- Live events/webinars
- Inspirational
- Storytelling
This is important to realize because the equipment you choose for your studio should depend on the type of podcast you’re producing, as well as other factors like your budget and your recording environment.
So, keep that in mind. The equipment is here to serve your needs—not the other way around—so make sure to get what will work for YOU.
The Podcast Production Process
Before we dive into the podcast equipment itself, I think it will be helpful to cover what the typical podcast production process looks like.
(RELATED: How to Launch a Podcast, Drive it to the Top of the Charts, AND Keep it There in Just 4 Steps)
And generally speaking, there are two main steps involved:
- Step 1: Record
- Step 2: Edit and Upload
Here’s what the podcast flow looks like for the Perpetual Traffic podcast:
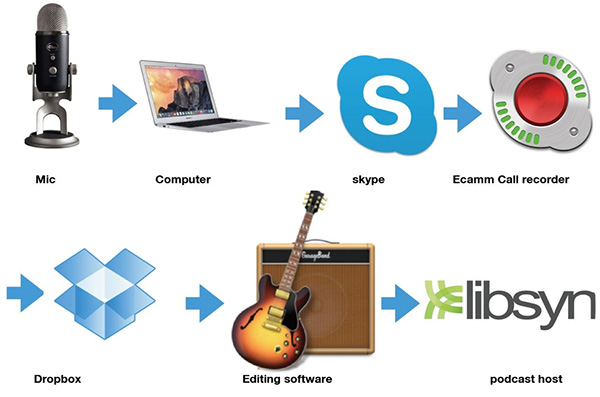
Now, this process will look different for different podcasts. If your show consists of just you talking, for example, then you won’t need to get Skype or a call recorder involved.
We use that for Perpetual Traffic because Molly, Keith, and Ralph are almost never in the same physical location for the podcast. So we record using Skype.
It’s a cool workflow because even though the hosts aren’t in the same room, we can still capture the chemistry of their relationships and their conversations by recording it live.
Once Step 1 is finished, the show moves on to Step 2. Which is where I take over.
And after the call is recorded, each person sends me their audio files for editing. This way, I get three high-quality redundant files, with three different versions of the Skype call. So if anything goes wrong with one file, I have two other backups. That has really come in handy during a few of our episodes.
Then I will go through and edit the show, and finally upload it using our podcast host Libsyn.
And along the way, at each and every step, we are using some piece of specialized equipment—whether it’s a condenser microphone, an audio mixer, or audio restoration software.
And in the rest of this post, I’ll share my top recommendations for each and every piece of equipment you need to produce your own professional-sounding podcast.
How to Choose a Microphone for Making a Podcast
When you think about podcasting equipment, the first thing that pops in your head is probably microphones.
So what kind of microphone should you use when making a podcast?
Well, the answer is that there’s no simple answer. The best microphone will depend on your specific needs and situation.
And when you’re purchasing a mic, the most important question to ask is:
What kind of environment are you recording in?
Are you recording interviews in public places, with lots of ambient noise?
On a stage in front of an audience?
In your car?
Or are you recording in a quiet studio at home?
Depending on your recording environment, a different type of microphone might make sense for your podcast.
And broadly speaking, there are two main types of microphones:
Condenser mics and dynamic mics.
(NOTE: Want to drive your podcast to the top of the charts and keep it there? Learn how with our 9-Step Podcast Launch Plan. Get the exact process we used to plan, launch, record, edit, and distribute a podcast that hit #1 on the Business charts and New and Noteworthy in just a week!)
Condenser Microphones
Condenser microphones are best used in a controlled environment (like a quiet studio).
They’re very accurate, very sensitive, and can produce fantastically high-quality audio.
On the downside, they’re also more delicate. They have a tendency to pick up external sounds, which can be problematic in public places. They also require power to run. This is called phantom power and is transferred to the mic through an XLR cable from a mixer or preamp.
Here are a few condenser mics that are popular with podcasters, at three different price ranges.
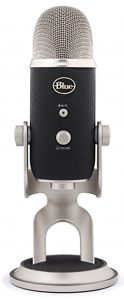
Level 1: Blue Yeti Pro ($249)
Source: Amazon
The Yeti Blue is a commonly used and much-loved microphone by a lot of podcasters. It’s probably the least expensive condenser mic that I would recommend.
If you’re recording in a quiet spot, have a somewhat limited budget, and want the best-quality audio you can get, the Yeti Blue is a great option.
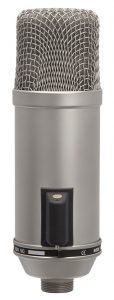
Level 2: Rode Broadcaster ($419)
Source: Amazon
This is a popular mic for professional radio. It is equally suitable as a voice-over microphone for film and television.
It’s designed to provide the ultimate performance for broadcast vocal applications.
The Broadcaster features an internal pop filter that minimizes plosive sounds from the speaker’s voice that can overload the microphone and distort the audio output (we’ll have more on this in the Accessories section below).
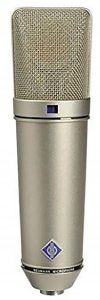
Level 3: Neumann U87 ($3,200)
Source: Amazon
At over three grand, this mic is out of most people’s price range. It’s really a Howard Stern-level mic. But I’m including it here to give you an idea of just how much you can pay for a really powerful condenser mic.
And this gives you an example of one of the downsides to condenser mics, which is their price tag.
Condenser mics are hard to make. The mechanism is delicate and complicated. And with technology like that, you get what you pay for.
You can get some really amazing sound from a condenser mic, but you’ll have to pay at least $300-$500 on the low end.
Now if you don’t have that kind of budget, or if you’d rather get more bang for your buck, then you might be more interested in a dynamic microphone.
Dynamic Microphones
Dynamic microphones are great for louder environments because they won’t pick up as much ambient noise.
If you’re recording somewhere with background noise—in the car, in a restaurant, or even in a room with outside noise coming in through the window—then a dynamic mic is probably a smart choice.
Compared to condenser mics, which can be quite delicate, dynamic mics are more rugged. You can throw them in a suitcase and take them on the road without having to worry.
Here are the three dynamic microphones I recommend, with an option for every price range:
Level 1: ATR-2100 ($75)

Source: Amazon
This is a really popular microphone. Tim Ferriss even recommended it on his blog, saying it has “the best bang-for-the-buck value I’ve found.”
It’s a great mic at a great price. It’s also super versatile—you can use it as a USB mic, or you can use an XLR cable to plug it into a mixer.
Now if you’ve got a little more money to play with, you could consider upgrading to…
Level 2: Rode Podcaster ($229)

Source: Amazon
The Rode Podcaster is a great all-around mic. It produces really nice sound and has a built-in pop filter.
This is the microphone Russ Henneberry and Ralph Burns use.
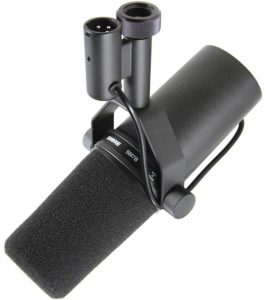
Level 3: Shure SM7 ($500)
Source: Amazon
This is what we use in the DigitalMarketer studio. It’s a killer-sounding mic.
Notice that even at the high end, these dynamic mics are still quite a bit less expensive than the condenser mics. That’s because dynamic mics use a much simpler mechanism. As a result, you can pay less and still get great-sounding audio.
So, if cost is a big factor for you, it probably makes sense to go for a dynamic mic when you’re just getting started.
Condenser and dynamic mics will be the best choice for most podcasters, most of the time. But sometimes, depending on the nature of your podcast (and the location where you’re recording it), you might need a more specialized mic.
For those situations, you’ll probably want to look into a lavalier mic or a shotgun mic.
Lavalier Microphones
Lavalier mics are a form of condenser microphones that you clip to your shirt. As a result, they’re very mobile, which makes them perfect for speaking on stage or any other time you need to walk around.
They’re also a great choice for times when it’s not appropriate to spend a lot of time setting up big microphones—impromptu interviews and so on. In fact, because they’re so small and inconspicuous, you can take them just about anywhere without making it too obvious that you’re recording.
One trick that I use when recording in a restaurant is to clip a lavalier onto the side of an empty glass. Then slide the glass toward the person you’re interviewing.
You’ll get great audio and can still capture the magic and maintain the chemistry between you and your guest, without having to embarrass them or interrupt the moment.
There are a lot of great lavalier mics out there. Here’s a convenient option for anyone with an iPhone:
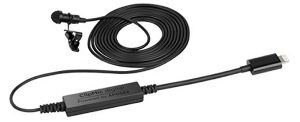
Sennheiser ClipMic ($200)
Source: Amazon
The ClipMic is a really cool lavalier microphone that plugs right into an iPhone, which makes it super convenient—just plug it into your phone, clip it onto your shirt, and you’re ready to record.
There are other lavalier mics available, of course. But most of them are designed to plug into a wireless system which does make it more expensive.
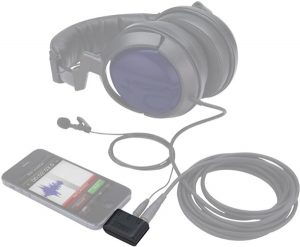
Rode SC6 ($20)
Source: Amazon
This is a handy little adapter that allows you to plug a lav microphone and headphones into your phone for doing phone interviews.
In order for this to work you need to use a lav mic built for the iPhone like a smartLav by Rode.
But using something like the Rode SC6, you can plug your mic right into your phone to record a call.
Shotgun Microphones
If you’re shooting in a noisy room, especially with multiple people (when giving everyone a lavalier might be problematic), you’re probably going to want to use a shotgun mic.
Shotgun microphones are very directional. Think of them like sound flashlights. They record in the direction you point them, but ignore any sound coming from other directions.
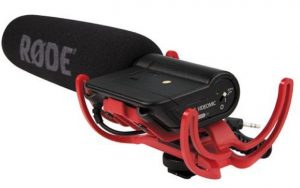
High-end shotgun mics can run upwards of $800 for the NTG3. But for a fraction of the price you can get another really nice shotgun mic from Rode, the VideoMic.
Rode VideoMic ($150)
Source: Amazon
One cool thing about the VideoMic is that you can mount it right on top of a camera. Obviously, most podcasters aren’t doing a lot of video. But if you need to record a video every now and then, this gives you a really easy point-and-click solution:
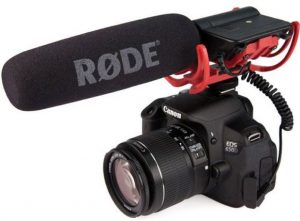
And like I mentioned, this will do a great job of filtering out background noise. It’s a good choice if you’re going to be recording in public places like conventions.
(NOTE: Want to drive your podcast to the top of the charts and keep it there? Learn how with our 9-Step Podcast Launch Plan. Get the exact process we used to plan, launch, record, edit, and distribute a podcast that hit #1 on the Business charts and New and Noteworthy in just a week!)
Accessories
Now that we’ve covered mics, let’s talk about some of the useful accessories that can help make your microphone even more effective. Depending on where you record your podcast, you’ll almost certainly be able to improve the audio quality of your show with a few of these accessories.
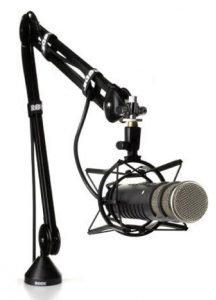
Boom Arm
Source: Amazon
A boom arm is a nifty little tool that lets you suspend your microphone and swing it back and forth. It’s a useful way to store your microphone on your desk. You can let your mic hang safely out of the way, and then easily pull it in front of you when you’re ready to start recording.
It’s also a helpful accessory anytime you have a guest but only one microphone. It’s an easy (and quiet) way to swing the mic back & forth between speakers.
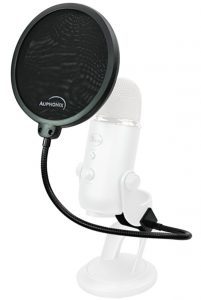
Pop Filter
Source: Amazon
Pop filters are one of the most useful accessories on this list. If you’re serious about recording a podcast, you’ll almost certainly want to get one. (Luckily, they’re cheap—$10 to $20 in most cases.)
So, what do they do?
Pop filters help by filtering out the plosives from your voice. Plosives are an explosive sound that comes when you say a word with a p sound (to a lesser extent, the letters t, k, d, g, and b can also cause plosives).
Without a pop filter, plosives will really jump out in your audio files. They cause distortions and will generally make your podcast sound less professional.
So just do the easy thing and use a pop filter. It’ll improve your audio quality and save you time in editing.
That said, some people have more pronounced plosives than others. Some people have faint plosives, while some people have such loud plosives that they use two pop filters at once.
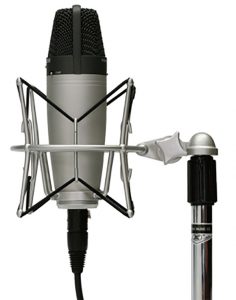
Shock Mount
Source: Amazon
A shock mount is a cradle that holds your microphone. It secures your mic with elastic bands that cut down on vibrations.
So, if your microphone happens to shake a little bit during recording—maybe a truck rumbles by, or maybe you just accidentally bump into it—the shock mount will minimize any extra noise or distortion.
Acoustic Treatments
Source: Amazon
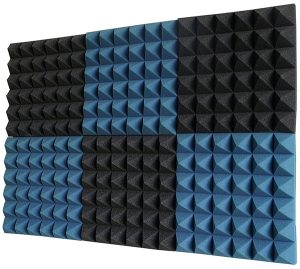
Have you noticed the way movie theaters always seem to have drapes having over all the walls? That’s no accident. Those acoustic drapes help cut down on echoes and improve the sound quality of the movie.
And if you have a room that you’re using as a recording space, you can do the same thing. Just line your walls with acoustic treatments like these foam covers. They’ll give you a better acoustic environment for your podcast.
You can also use things like heavy curtains over the windows, drapes, and bookcases full of books. Soft things that can absorb the sound and prevent it from bouncing around the room.
(Just don’t waste your time with egg cartons. They don’t work well as an acoustic treatment.)
Headphones
Source: Amazon
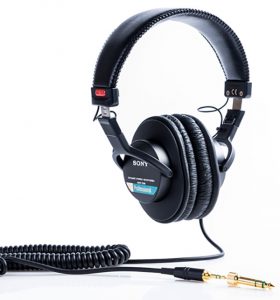
If you have any other sounds happening during your show—like audio from a person you’re interviewing—you’ll have to wear headphones so you don’t get feedback in your mic.
You don’t have to spend a ton of money here. The iPhone headphones are actually pretty good for this.
Another good option is the Sony MDR Series. They don’t have a lot of bass, but they let you hear the whole vocal range, which makes them great for podcasting.
Headphone Amp

Source: Amazon
If you’re doing a show with multiple hosts, you might want to invest in a headphone amp. This basically allows you to plug in multiple headphones and give everyone control over their own headphone volume.
This way, everyone can hear what’s going on without generating any feedback.
Recording Devices
OK, so far, we’ve talked about microphones—which is the device you’re recording WITH. But what are you recording ONTO?
That’s where recording devices come into play.
And there are a few different options here:
- USB microphone plugged into your computer (for one person)
- Audio interface (for two people)
- Mixer (for a more complex setup)
- Field recorder (for when you’re out and about)
- iPhone/iPad (convenient but lower quality)
Now here’s a brief description of each of these options:
USB Microphone
The first, simplest, and easiest option is to simply plug a USB mic into your computer. If your podcast consists of just you, and you’re recording at home, this is the method you should use. You don’t need anything fancier than that.
But once you start adding more people (either guests or co-hosts), and moving to new locations, things start to get a little more complicated.
You could use a single USB microphone with two people…but it wouldn’t be ideal. For one thing, you’d both need to lean in toward the microphone together. It would be awkward.
And then your finished audio file would all be on one, single audio track—which means you wouldn’t be able to easily edit each person’s speech separately.
So, for a two-person show, you’re better off using…
Audio Interface
Here’s an example of an audio interface—this is the Focusrite Scarlett ($250):

Source: Amazon
This device allows you to record two mics at the same time on separate channels. And because it’s a USB preamp, you can plug it directly into your computer.
If you need more than two mics, then you’ll need…
Mixer
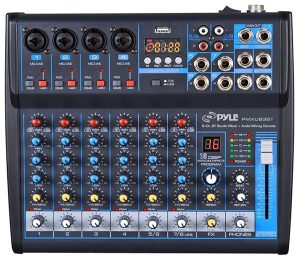
Now if you’re doing an even more complex setup—maybe you have three hosts, are doing some sound effects, and want to incorporate live calls—you’re going to need a mixer to mix together and control the audio from many different sources.
Source: Amazon
Now don’t let that picture intimidate you. It looks complex, but it’s basically the same thing as the audio interface you saw above. The only difference is that this includes more than just two channels and has some audio processing like equalization.
So, once you understand how to use the dials to control one channel, you’ll know how to use them all.
Field Recorder
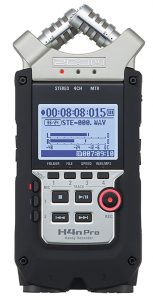
If you want to capture high-quality audio while you’re out and about, you’re probably going to want to use a field recorder. These are really popular devices with a lot of podcasters.
The most popular brand is the Zoom:
Source: Amazon
You can plug up to two microphones into this, or you can use the built-in mic. It’s small and light, so you can carry it just about anywhere.
iPhone/iPad
Lastly, you can simply record on your phone. And this isn’t going to give you the best audio quality around, but it’s by far the most convenient option.
Especially if you use some of the microphones that we talked about earlier—like the Sennheiser ClipMic—that plug right into your phone.
Post-Production Software
Once your podcast is recorded and saved on your computer as an audio file, the next step is to edit it.
Editing is where you can tweak and polish the podcast, delete “dead air,” adjust and equalize the volume levels, and otherwise clean it up and make it sound more professional.
Here are three different levels of editing software to consider, starting with two free options (one for Windows and one for Mac), a mid-level option, and a premium option.
Audacity (Free – Windows)
If you’re running Windows and looking for a free way to get started, give Audacity a try. It can do all the basics and is a good introduction (particularly if you only need to do basic editing).
Garage Band (Free – Mac)
Garage Band comes free on all Macs and is actually a pretty great program. It’s also really easy to use, which is a big plus for beginners.
If you’re getting started and you use a Mac, definitely start by using Garage Band.
Logic Pro ($199)
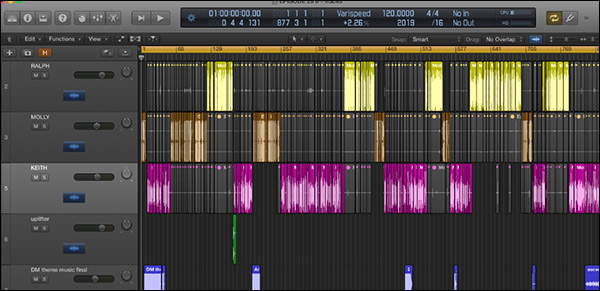
This is the program I use, and it’s a really amazing piece of software. You can do some really deep-dives into editing and significantly improve the sound of your podcast.
Here’s a quick shot of what an episode of Perpetual Traffic looks like as I’m editing it inside of Logic Pro:
Adobe Audition ($20/month and up)
Adobe Audition is a really premium software. It pretty much has everything you need, along with a lot of cool features you won’t find in most other editing programs.
It’s almost made for creating podcasts.
The only downside to Adobe Audition is the monthly recurring subscription fee. So you probably don’t want to invest in this software until you’re sure that you need the extra features Audition provides.
Audio Restoration Software
When you record outside, or in public, inevitably you’ll have distracting noises. A dog will bark. Someone will sneeze. A group of motorcycles will drive by.
Now back in the day, to get high-quality audio you had to record in a studio. And the reason was pretty simple: because there was no easy way to get rid of those distracting noises.
Well, today there is.
Using audio restoration software, you can perform surgery on your audio files. In a way, it’s kind of like Photoshop for audio. You can use it to crop out any distracting sounds.
Here’s an example of a file I cleaned up using Izotope RX ($399). This is the “before” image:
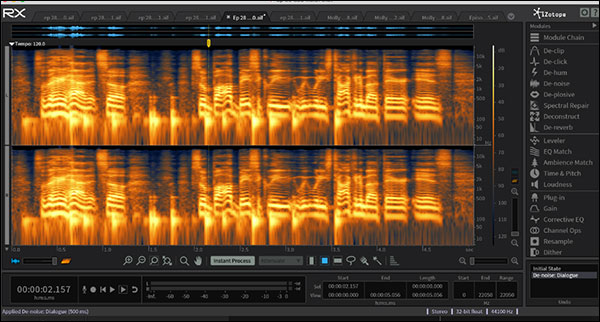
And here’s what it looked like after I removed the distracting noises:
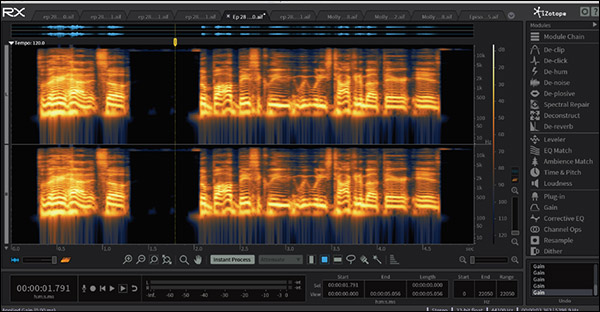
Now, this software isn’t cheap. But if you’re recording outside or in noisy environments, it can work some serious magic.
(Note: Adobe Audition has its own audio restoration features, so if you go that route you won’t need to buy Izotope RX.)
Adding Music to Your Podcast
If you listen to the Perpetual Traffic podcast, you’ll notice we use a lot of music throughout each episode.
It has to reflect the vibe, the mood, and the flavor of what you’re going for.
Not entire songs or anything. Just bits and pieces—sometimes just sound bytes—to punctuate the text. Think of it like bullet points…
- Music breaks up the talking
- Helps us emphasize certain points
- And improves the meaning and flow of the conversation
Music is important in podcasts, and you have to be really intentional when you’re choosing it. It has to reflect the vibe, the mood, and the flavor of what you’re going for.
Remember, there’s no video. No images. So the music really becomes like your audio brand.
For Perpetual Traffic, we created our own custom music. But you don’t have to do that! (Especially when you’re just starting a podcast.)
Instead, you can get started with stock music. Just make sure to search for “podsafe music,” which means you can legally use and distribute it through your podcast without paying royalties.
Podcast Hosting Services
OK, so your podcast is recorded and edited. You’ve exported it from your post-production software and it’s sitting on your desktop as an MP3.
Now what?
Your next step is to upload the file to a podcast host.
The podcast host is the place where your files live online. It hosts your files so they can be added to iTunes and found/downloaded by podcasting apps.
They also take care of some technical housekeeping stuff, like generating an RSS feed, scheduling shows in advance, and generating show statistics.
Now, strictly speaking, you don’t have to use a podcast host. You can probably create your own RSS feed and sign up directly through iTunes. But a podcast host makes the process much, much easier, faster, and more hassle-free. I highly recommend using one.
At DigitalMarketer, we use a podcast host called Libsyn. It’s a great service—easy to use and it works great. The cost varies from $5/month to $75/month, depending on what you need. Paying more gets you more storage space and more advanced analytics.
Libsyn is a great choice, but if you want to comparison shop, here are some other good options:
Once your podcast is hosted and you have a valid RSS feed, there’s one final step. And that is to sign up for Podcast Connect and enter your RSS feed URL from your podcast host. This is how you get your podcast onto iTunes.
Overcome That Inertia & Get Started
You’ve just learned a TON about podcasting equipment.
Your head might be spinning a little bit right now. If it is, that’s OK!
The important thing to remember is this:
Get started with the best equipment you can…but don’t let the tools stop you from launching.
If you really want that $800 Rode NTG3, but can’t afford it yet, don’t let that be a barrier. Choose a cheaper mic to start—such as the Rode VideoMic—and upgrade when you can afford to.
Remember, guys: launching a podcast is like launching a cruise ship.
The inertia is always greatest at the beginning.
Once the ship gets moving, you’ll start to develop some momentum. And it’s always a lot easier to improve a podcast that you’re already producing than it is to begin something brand-new.
So, don’t put it off. Get the best stuff you can for now and launch the darn thing. You can always improve it over time.
Podcasting is a marathon, not a sprint. And the best way to reach your goal is to start running as soon as you can.
(NOTE: Want to drive your podcast to the top of the charts and keep it there? Learn how with our 9-Step Podcast Launch Plan. Get the exact process we used to plan, launch, record, edit, and distribute a podcast that hit #1 on the Business charts and New and Noteworthy in just a week!)
The post How to Create a Podcast Studio on a Shoestring Budget appeared first on DigitalMarketer.
from How to Create a Podcast Studio on a Shoestring Budget

No comments:
Post a Comment