Thursday, August 2, 2018

How to Write Blog Comments That Stand Out to Influencers (Plus Examples!)

You’ve heard the advice a million times.

Write great comments on popular blogs, and your blog will grow. Why, it’s so easy even a caveman can do it!

And it’s true — comments can be powerful. A great comment can land you on the radar of a popular blogger — the kind of super-connected influencer who can accelerate your success.

It sounds so simple.

The only problem?

Nobody tells you how to comment on blogs. You aren’t sure what a great comment looks like.

Is it a comment that shovels heaps of praise onto the author? Or one that argues a persuasive alternative view? Or one that simply thanks the blogger for their insights?

Because while many experts preach the virtues of strategic commenting, almost nobody tells you how to do it.

As a result, many well-intentioned bloggers are spending their precious time writing comments they think are great.

In reality?

Their comments usually suck.

Why Clumsy Commenters Make Terrible First Dates


If you think about it, blog commenting is a lot like dating.

You’re trying to woo another person, right?

With dating, you’re trying to woo someone into becoming Mr. or Mrs. Whatever Your Name Is.

With blog commenting, you’re trying to woo the owner of a blog.

You want them to notice you. You want them to reply to your comment. Secretly, you want them to visit and comment on your blog, follow you on social media, and ultimately become your best friend forever.

But is that possible if your comments are lame?

Sure, it’s possible

It’s also possible to stumble into marriage, kids, and a house with a white picket fence even if you turn up to your first date with a mustard stain on your shirt and used the pickup line, “Did you hear about Pluto?”

But just because it’s possible doesn’t mean it’s likely.

That’s why it’s time to improve your commenting game.

To help you do that, let’s look in detail at the anatomy of a great blog comment.

But first, let’s look at the rookie mistakes that make most blog comments totally suck.

The Common Mistakes That Make Comments Suck


Mistake #1: Using a Novelty (or Non-Existent) Gravatar Image

You wouldn’t show up to a first date wearing a disguise, would you? Or wearing a plain paper bag over your head?

So why would you choose an image of Grumpy Cat or Ron Burgundy to represent you in blog comments? Or settle for the faceless silhouette that screams generic nobody?

Instead, let people see the real you.

They will be far more likely to feel a connection with you if they can see your face.

Besides, you know you’re sexy. Show us that smile!

Mistake #2: Using a False Name (or “Fun” Nickname)

Among your friends and family, you can go by Lil’ Bit, DJ Roomba, Superfly, House of Shane, or any other nickname you choose.

But unless you’re a spy, or in witness protection, using your real name on a first date is just the right thing to do. (Unless, of course, it’s a blind date and Gary Busey sits down at your table.)

The same is true in blog commenting. Bloggers, just like dates, want to know who’s trying to woo them. And someone who hides behind a pseudonym likely isn’t a long-term prospect.

Mistake #3: Dumping Links in Your Comments

Imagine you’re on a date and, halfway through, your date suddenly asks if you have life insurance.

You try to wave it off, but they begin discussing rates and policies with you.

“Oh no,” you think to yourself. “This isn’t a date … this is a sale’s pitch!”

If you embed links in your comments, bloggers are likely to react similarly. It comes across as a cheap attempt to peddle your lemonade on their lawn.

And usually it won’t matter how insightful your words are or how relevant your link may be; the blogger will feel an irresistible urge to kick you off their property.

Mistake #4: Failing to Read the Post Before Commenting

Ever been on a date with someone from Match or eHarmony who didn’t bother to read your profile?

“Do you have any hobbies?” they’ll ask despite your profile’s thousand-word tribute to paper mache. “Fancy a juicy steak?” they’ll suggest despite your publicly stated veganism.

It’s the same with blog commenting. Yes, you’re busy. Yes, reading a post thoroughly before commenting takes time.

Know what else takes time? Getting your foot out of your mouth.

When you comment on a post after skimming it or — worse — not reading it at all, you greatly increase the chances you’ll say something silly.

Mistake #5: Droning On and On (and On)


A long-winded blog comment, by its very length, defends itself against the risk of being read.Kevin Duncan

Some people like the sound of their own voices. Ask them what music they like, and they’ll take you on a 12-minute journey into the minutia of John Mayer’s latest album.

One-sided conversations on a date are not much fun and neither are blog comments that last forever and a day.

Many great comments are on the longer side, but be careful not to confuse quantity with quality.

A 500-word comment isn’t better than a 100-word comment. It’s usually just five times longer.

(And probably five times more boring.)

Mistake #6: Repeating What the Post Just Said

Ever had a date where the other person repeated everything you said?

You love Kevin Costner movies? So do they.

You adore Mexican food? Yep, them too.

You hate Mondays? They hate Mondays.

In the blogging world, this kind of parroting is a (re)Pete Comment.

(re)Pete comment

It doesn’t add to the conversation. It doesn’t ask questions. It doesn’t challenge an idea.

It simply repeats what was said in the post.

It’s okay to summarize, but your comment needs to be more than the CliffsNotes version of the post you just read.

Otherwise, what’s the point?

How to Write a Good Blog Comment (Plus: Lots of Examples)


Now that we’ve inoculated you against writing comments that truly suck, let’s look at the structure of a comment that stands out for all the right reasons.

How does a great comment begin? How does it end? What’s the stuff that goes in the middle?

Here are the essential parts, from top to bottom.

Part #1: The Friendly Greeting


The first thing I look for is personalization. This is so easy, all it takes is to just include the name of the author.Blogging Wizard

Let’s go back to our dating analogy…

You meet your handsome guy or beautiful gal at a restaurant for your first date. Could they be the one? They don’t look crazy or anything.

Hopeful, you take a deep breath, smile, and say hi.

But instead of greeting you or even acknowledging you, your date just starts talking.

No preamble — they launch right into talking about their day.

Did you know they have a co-worker named Mr. Buttons? Did you know they have a peanut allergy?

You do now.

Memorable date? I suppose.

A date you would like to get to know better? Definitely not.

And yet, every day, thousands of comments are written that do not bother to acknowledge the post’s author in any way, shape, or form.

Do they think robots wrote the post instead of a human being? Do they believe greetings are an outdated ritual from a bygone era? Or are they simply too lazy to scroll back to the top to find the author’s name?

If you’re hoping to catch the attention of bloggers and strike up a relationship, a healthy dose of proper etiquette can go a long way.

So say hello to them.

Greet them.

Refer to them by name.

How To Do It

This one’s so simple, it shouldn’t need explanation. But here’s how to do it anyway.

Scroll back to the top of the post and find the author’s name. If you are prone to misspellings, here’s a comment editing tip — copy the name so you can paste it into your comment.

Then say hello. Or hi. Or howdy, if you’re feeling folksy.
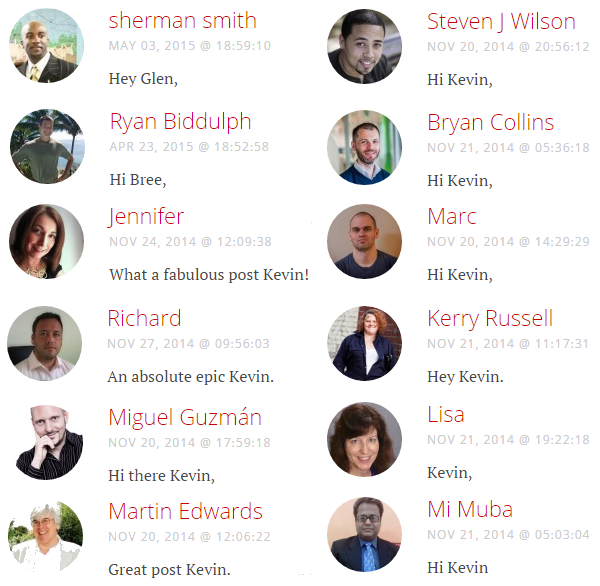
commenting with blogger's name

You’ll only spend a few seconds to get your comment started on the right foot.

It’s time well spent.

Part #2: The Sincere Compliment


It’s a nice confirmation when an author’s work is validated, and they can see the fruit of their labor.Carol Amato

You meet your date for the first time.

“Wow! I love your outfit,” you might say.

Or, “I really like your car.”

Or even, “Your SpongeBob tattoo is awesome!”

The details are different each time, but the act is the same. When you’re on a date, you pay the other person a compliment. It’s what you do in civilized societies.

Once again, blog commenting isn’t any different.

Remember, you’ve chosen to be on this person’s blog, not someone else’s. You’ve chosen to read their post instead of another. You must have a reason to want to connect with them over any of the other million bloggers you could be trying to connect with at that moment.

Chances are, you like them. You value them. You respect them.

So pay them a compliment…
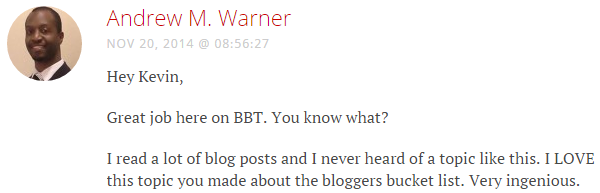
compliment comment

Tell them how much you enjoyed their post…
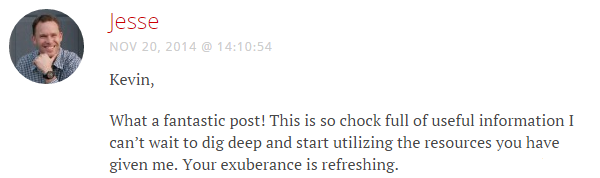
enjoyed post comment

Make their day…

make-their-day comment

Tell them you dig their groovy tunes…
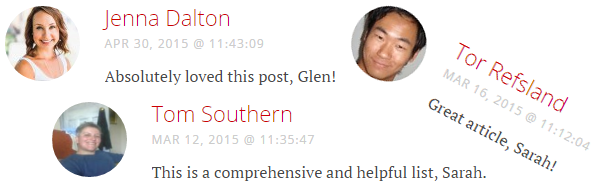
dig their groove comment

In short, pay them a compliment. Any compliment. Just make sure it’s a sincere compliment.

How To Do It

You can focus on the blogger, the post itself, or a combination of the two.

Are you a fan of the blogger’s body of work? Tell them so. Say how much you enjoy their writing. Even better? Tell them about a specific example where their writing has helped you.

If you choose to focus on the post itself, talk about a particular point within the post that truly hit home for you. Did it change your outlook on a topic? Did it motivate you to go out and take action? Did it rock your world? Tell them so.

Note: In order to sound sincere, refrain from heaping too much praise onto the bloggers themselves. A little praise can go a long way. For this reason, it’s often best to focus on the post rather than the blogger.

(Plus, you don’t want to come across as a creepy stalker.)

Part #3: The Added Value


My favorite comments add extra value to a post. Perhaps they add a personal experience, a different perspective or a new question.Henneke Duistermaat

Now we’re into the meat of what makes a great comment great.

Greeting the author and paying a compliment are nice, but no one cares how good the appetizers are if the main course is a garbage sandwich with no mayo.

Your goal in every comment should be to add value. If your comment doesn’t add value, it’s wasting everyone’s time.

Of course adding value has become one of those overused and meaningless phrases in the blogging world. Like Sriracha sauce, people tend to throw it around and use it for everything.

What does it actually mean?

In this context, it means doing something that makes you appear valuable — useful, insightful, entertaining, or interesting — to the blogger you’re aiming to woo. In other words, anything that establishes you as a person worth knowing and helps develop a personal relationship.

You do that by making a positive impression and then building upon it.

But how?

Let’s review some tactics that work every time.

Value Tactic #1: Share Personal Insights or Anecdotes

Did a particular point in the post hit home for you? Did you find something particularly relatable? Did the post bring up an area in which you’re struggling?

When you share a personal insight, bloggers can more easily relate to you. You’re no longer just an unfamiliar name making a comment that could have been left by anyone…

You’re a blogger with a story!

How To Do It

Don’t worry about channeling Herman Melville; remember, comments don’t have to be long to be effective.

Amanda Formaro demonstrates this perfectly in her succinct comment about email subscribers.
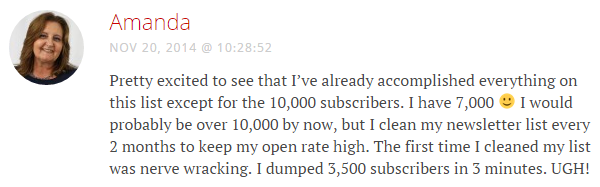
effective succinct comments

In the same discussion, Jenn establishes a connection by sharing her struggles.
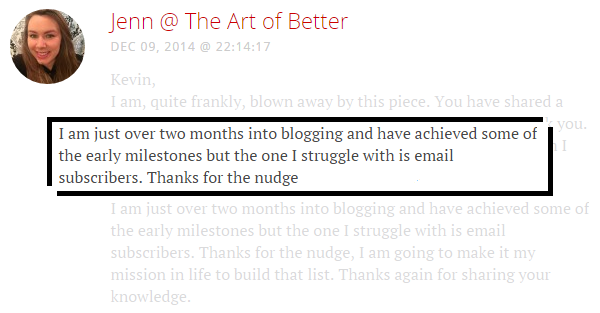
sharing struggles comment

Don Purdum, meanwhile, enhances the post by sharing details of a conversation he’d had just days earlier.
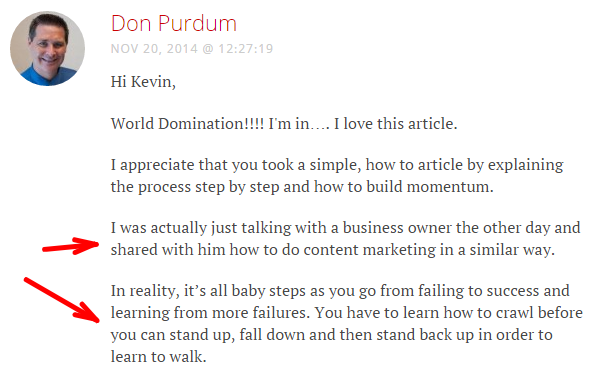
sharing details comment

The number of ways you can share insights and examples are myriad. But the more personal your insight, the more unique it will be. And the more unique your insight, the more memorable your comment will be and the more you’ll stand out.

Value Tactic #2: Ask Thoughtful Questions

Was an idea presented in the post that you didn’t fully understand? Did you want the author to expand on a certain point? Did the post spark an inquiry?

Asking thoughtful questions is an excellent way to build relationships because it starts a one-on-one conversation with the blogger.

You ask them a question; they answer. It’s pure, simple, poetry in motion. And it’s a great way to introduce yourself to bloggers you enjoy.

How To Do It

Andrew Warner went the inquiry route after reading Andrianes Pinantoan’s blog traffic case study:
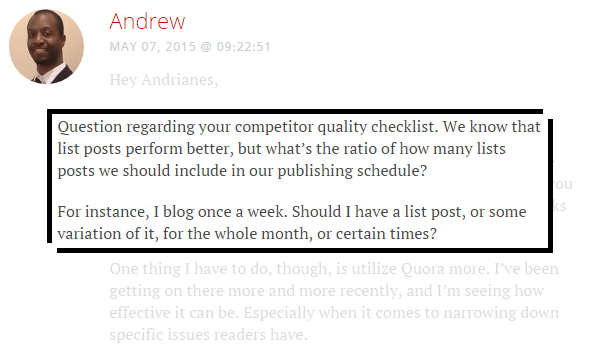
question comment

Pooja, an excellent writer in her own right, did the same after reading Glen Long’s post on crystal clear writing:
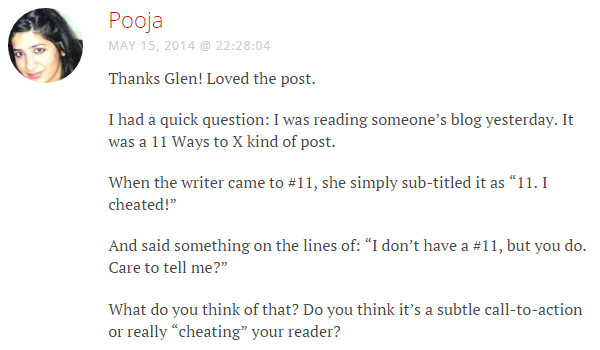
question comment 2

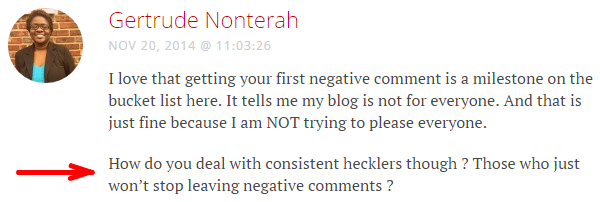
And Gertrude Nonterah, after reading the blogger’s bucket list, took the opportunity to ask a question that had been weighing on her:
question comment 3

Sometimes for brevity’s sake, an author won’t fully flesh out a detail in his or her blog post. So if the article contained a detail you want expanded upon, don’t be afraid to comment and ask.

Value Tactic #3: Contribute To The Discussion


If you want the attention of influencers and blog owners, your comment should add to the conversation.Sue Anne Dunlevie

Were 10 ideas presented in the post, but you know an 11th? Want to flesh out a point discussed in the post? How about a detail that wasn’t covered at all?

If your comments enhance the overall value of the post, few bloggers will fail to see the benefit of your contribution. Sometimes they’ll even update their post in light of your comment — which is a major validation of your ideas.

And bloggers love when the comment count for their posts get higher and higher. It’s validation that their work is reaching people.

When you write a great comment that adds to the discussion, it often has a domino effect. Others will respond to your comment, which will fuel even more comments.

The result is more people reading and discussing the blogger’s work, which means a higher comment count.

Bloggers love that — and they love the commenters who help make that happen.

How To Do It

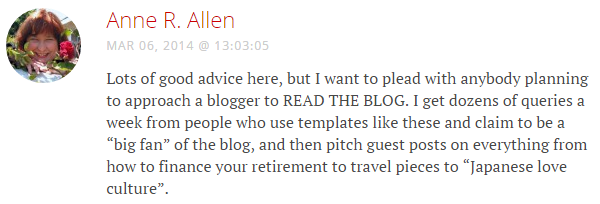
A great example of this is the following comment Anne R. Allen left Brian Dean in his blogger outreach post here at Smart Blogger.
add value comment

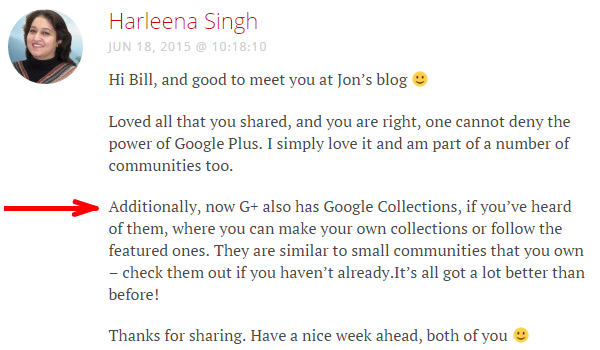
Another is the comment Harleena Singh left Will Blunt in his guide on Google+.
add value comment 2

And one of the best examples you’ll ever see is the comment Matthew Harding left on Smart Blogger’s post on blogging milestones. Here is a snippet:

add value comment 3

When you add value via a great comment, you’re investing in the blog post.

Blog owners love that. They appreciate it.…
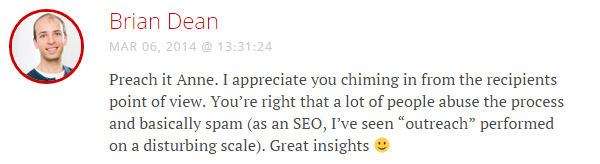
blogger reply comment

They learn from it.…

blogger reply comment 2

They remember it.

bloggers remember good comments

Part #4: The Parting Promise


I love it when commenters tell me they’ve shared or will share my work. The ideal comment would come from someone who both tells me they’re going to share, and then remembers to tag me when they do.Brittany Bullen

After a successful first date, each person is usually looking for a clue that that the other enjoyed themselves and that a second date might be in the cards.

That clue could be a lingering smile. It could be a casual remark about not having any plans the following Saturday. It could be the other person actually saying, “I enjoyed myself and would like to see you again.”

Whatever form it takes, it sends the message that this date was not just a one-off.

And when wooing a popular blogger, you’d be smart to let them know you’re interested in a longer-term relationship too.

That’s why great blog comments make a promise at the end. They tell bloggers, “Hey… I enjoyed this so much I want to keep the party going!”

How To Do It

One great way to make a promise is to tell the author you’re going to share the post on your favorite social media platform…
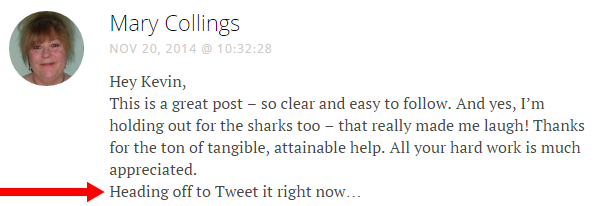
social media share comment

Tell them their post is so good you have no choice BUT to share it…
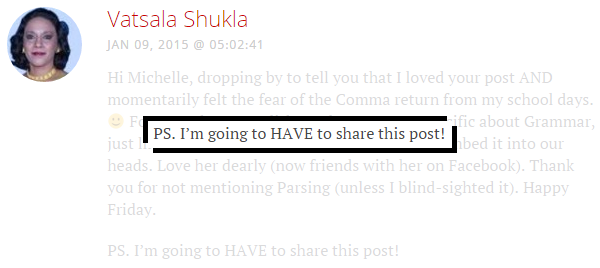
social media share comment 2

Or channel your inner Arnold Schwarzenegger and tell them, “I’ll be back” (to read more of your content)…
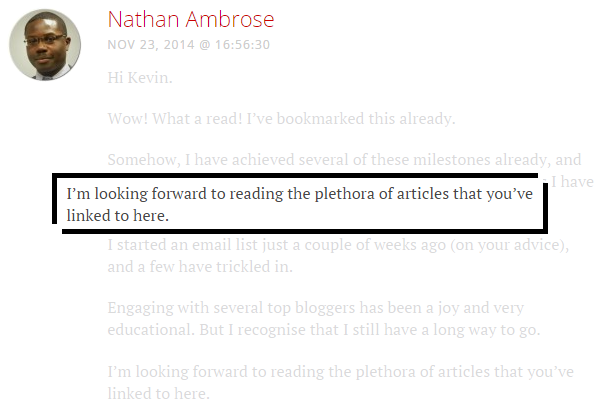
"I'll be back" comment

But whatever promise you make, be sure to keep it.

Tweet the post like you said you would. Read the blogger’s other posts, and leave more comments. In other words, do exactly what you said you would do.

And when you share the post on your favorite social media platform, be sure to tag the blogger — let them know you followed through…

social media tag

And if the bloggers are anything like Will Hoekenga, they’ll notice and express their gratitude…
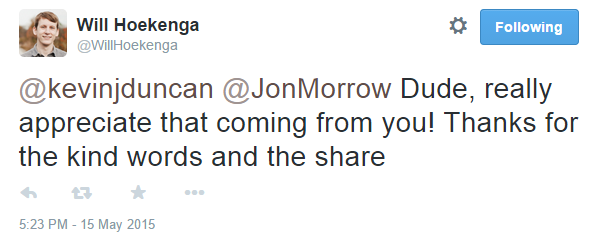
thanks for the tweet

Examples of Blog Comments that Kicked Butt (and The Extra Ingredient They All Share)


So what does a comment that has each of these elements look like?

It looks a lot like this comment from Adrienne Smith:
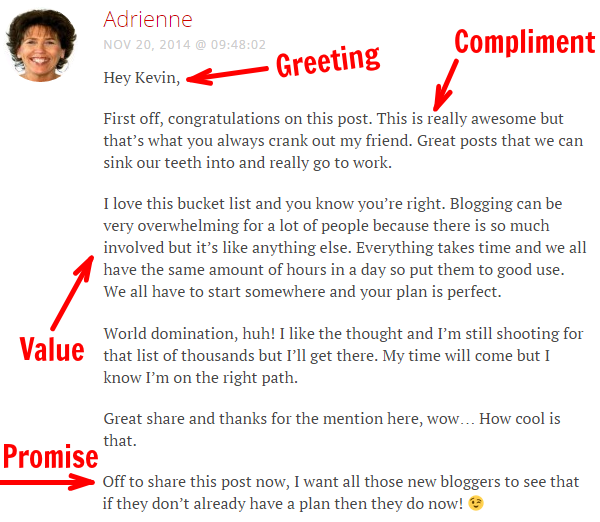
kick ass blog comment

And it looks a lot like this comment from Carol Amato:
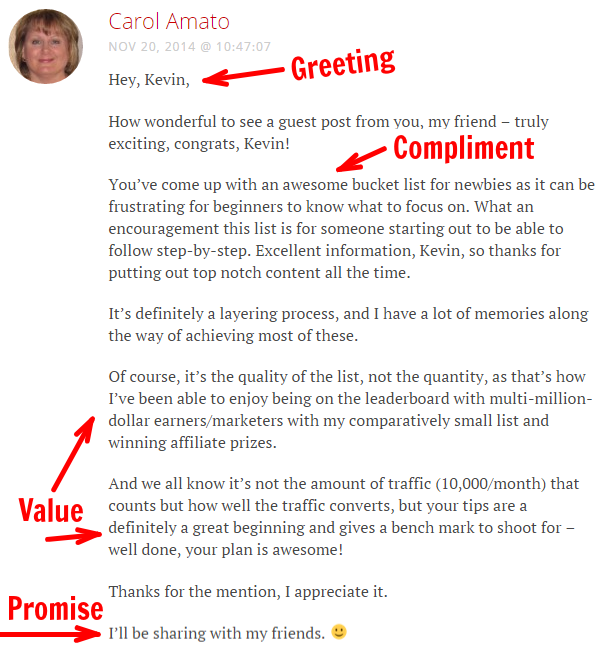
kick ass blog comment 2

Adrienne’s and Carol’s comments start with greetings, go straight to compliments, add value to make connections, and end on promises.

But beyond that, they add an additional element present in every great comment…

Personality.

Any robot can start a comment with a greeting and end it with a promise.

But for a comment to take that next step, for a comment to get you noticed by the blog’s owner, you have to let “you” shine through.

As Jaime Buckley once wrote: “Unless you’re engaging, my eyes will glaze over. We all have a personality, but do you use it? Does it come out in your comments?”

Jaime should know. He’s an expert at letting his personality shine through in his comments. The comment he left for “The Blogger’s Bucket List: 20 Must-Reach Milestones on the Path to World Domination” is a perfect example.

Here is a snippet:
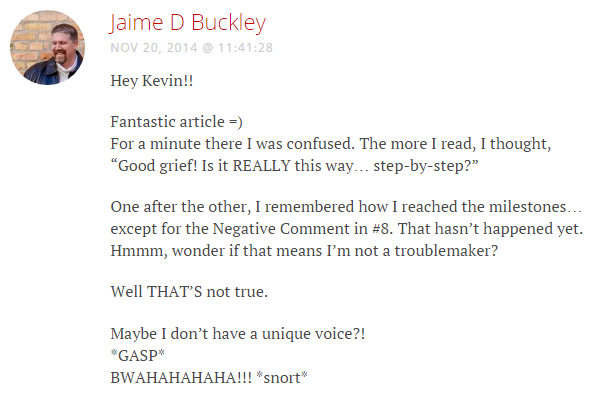
personality comment

Jaime writes his comments the way he might write an email to a friend.

It’s refreshing and it’s an excellent way to get noticed.

For a handy visual reminder of the four-part formula, check out the image below (click to see a larger view):
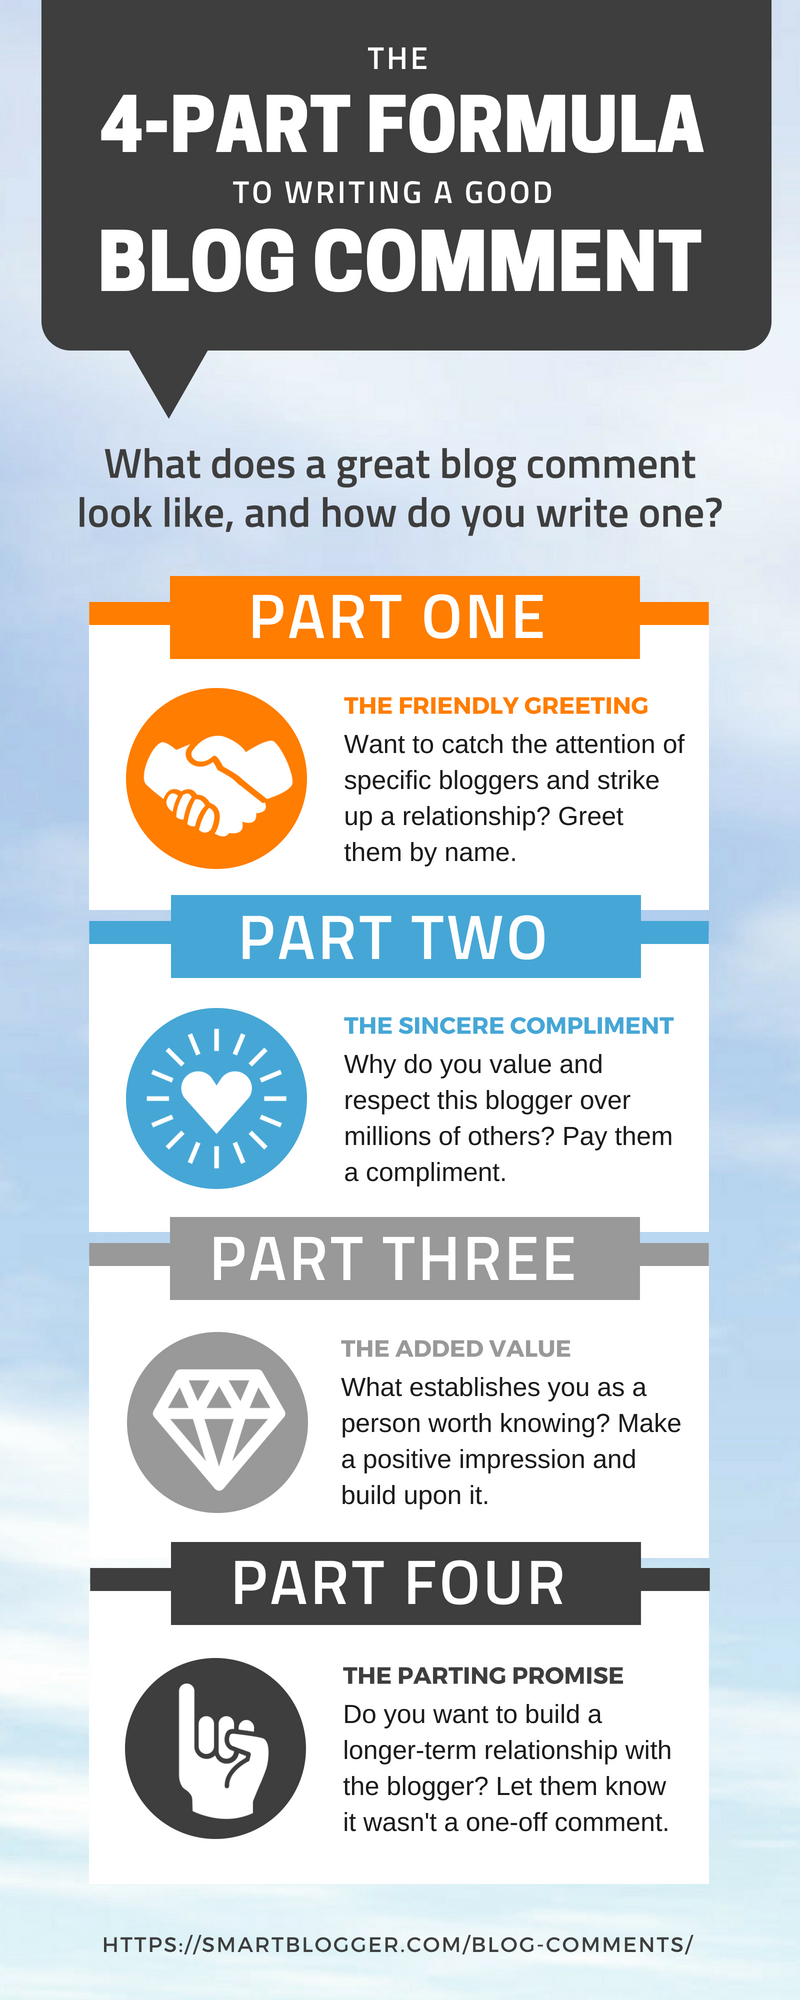
How to Write Blog Comments That Stand Out to Influencers (Plus Examples!)

 
Embed This Infographic On Your Site


The Rich Rewards That Flow from Carefully Crafted Comments


You may be wondering at this point…

Is it worth it? Is it worth putting all that time and thought into a single blog comment?

Well, that depends on what you’d like to achieve from your blogging efforts.

Would you like influential bloggers to notice you and follow you on Twitter?
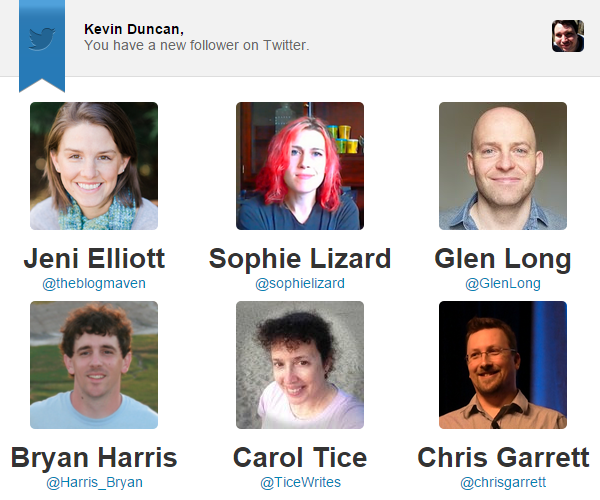
get noticed by influential bloggers

Do you want to expand your reach on other platforms like Google+?
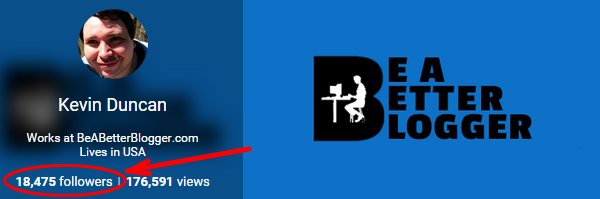
expand your reach

Would you like Darren Rowse, Pamela Wilson, and other blogging icons to share your posts with their followers?
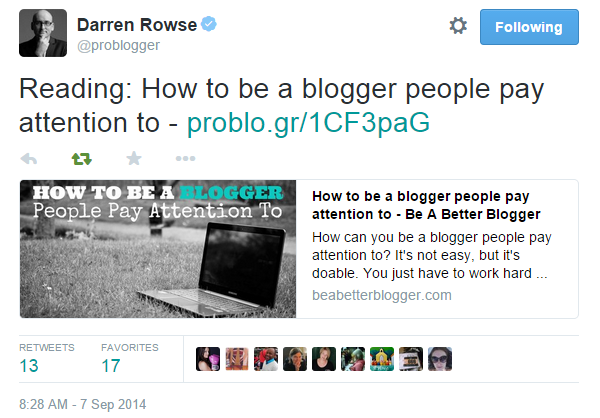
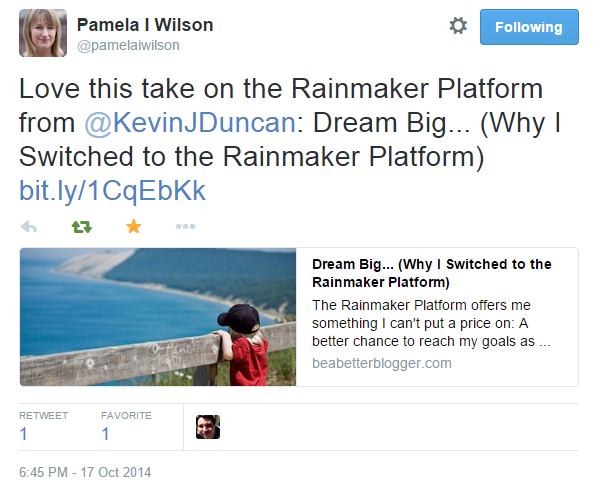
get shared by influencers
get shared by influencers 2

Would you like to be invited to participate in expert roundups, conferences, and other great opportunities?
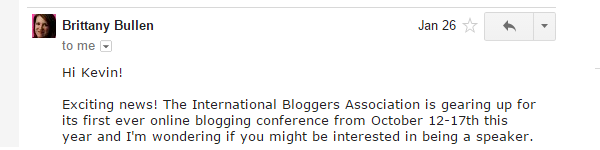
gain authority

Would you like to receive emails out-of-the-blue from super-cool and talented people asking you to write for them?
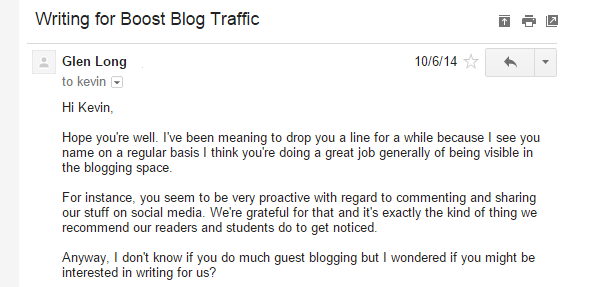
invitations to guest blog

Would you like to have your work published on one of the biggest, baddest blogs in the world?
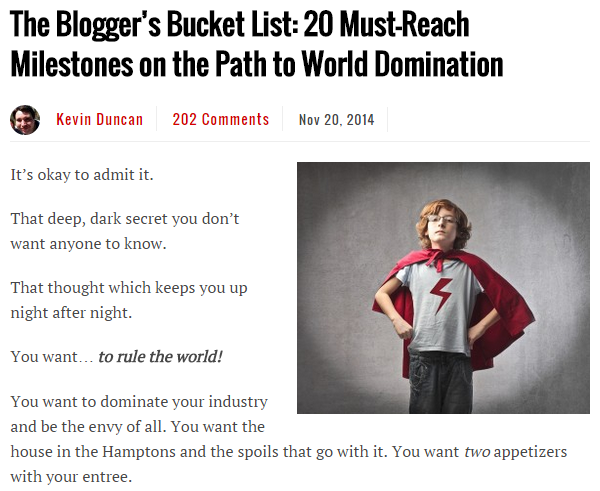
published guest blogs

Because this is what can happen when bloggers notice you.

It isn’t easy, and it doesn’t happen overnight. And, clearly, great comments alone won’t catapult you to world domination.

But they’re a critical, often-overlooked component. And most people who try it write comments that suck.

In a sea of sameness, great comments with great personalities stand out like Jim Carrey and Jeff Daniels at a charity gala for the preservation of the endangered Icelandic snow owl.

They’re capable of getting other bloggers to sit up, take notice, and ask themselves: “Who is that?”

So tell me, now do you think it’s worth it?

Let’s Find Out Where Comments Could Catapult Your Blog


Comments are perhaps the most misused — and least understood — weapons in the ambitious blogger’s arsenal.

That’s why most blog comments suck.

You now understand the anatomy of the perfect blog comment, so you can start crafting your comments with purpose.

Comments that get you noticed.

Comments that woo popular bloggers.

Comments that cause opportunities to drop into your lap.

The days of frowning cat gravatars are over. Repetitive comments are yesterday’s news. Empty contributions have gone the way of the dodo.

So, are you ready for a new era of smarter commenting?

Are you ready to discover where it could take you?

Then let’s do this thing.

About the Author: Kevin Duncan runs Be A Better Blogger, where he uses his very particular set of skills to help people become the best bloggers they can be. To further your quest to woo bloggers, he’s written a special post just for Smart Blogger readers: How I Went From Unknown to Boost Blog Traffic Writer in Six Months (and How You Can, Too).

The post How to Write Blog Comments That Stand Out to Influencers (Plus Examples!) appeared first on Smart Blogger.


from How to Write Blog Comments That Stand Out to Influencers (Plus Examples!)

Wednesday, August 1, 2018

SPI 329: One of the Most Important Business Conversations You Need to Have with Yourself—with Dan Andrews

#1631 Can selling domains and logos be a million dollar business?

I don’t understand how today’s guest has generated so much revenue with his business. Michael Rader is a Mixergy listener and his company is Brandroot. Brandroot helps entrepreneurs name their company, service or product. I invited Michael here to find out how he did it.

Michael Rader is the founder of Brandroot, which helps entrepreneurs name their company, service or product.

Sponsored by

Toptal – If you’re having trouble finding developers, Toptal is a network of elite pre-vetted software developers. You tell Toptal what you’re looking for, they search their network for the best people, they test the candidates, and then they present you with only the candidates who meet your individual needs. Once you pick someone you can start work with them the next day. They offer a no-risk trial period. Go to Toptal.com. Get the best of the best right now.


HostGator – Ready to take your website to the next level? Whether you’re a first-time blogger or an experienced web pro, HostGator has all the tools you need to create a great-looking website or online store. A wide range of options includes cloud-based web hosting, reseller hosting, VPS hosting and dedicated servers. Founded in 2002, HostGator is the perfect web partner for business owners and individuals seeking hands-on support. Visit https://ift.tt/2HikPBw to see what HostGator can do for your website.

More interviews -> https://mixergy.com/moreint
Rate this interview -> https://mixergy.com/rateint


from #1631 Can selling domains and logos be a million dollar business?

Tuesday, July 31, 2018

Episode 160: Not Getting Conversions with Facebook Ads? Follow These 11 Steps

Running Facebook ads is not a “set it and forget it” sort of experience. Even the pros have to keep an eye on their ads to make sure things are running smoothly. And things don’t always run smoothly…

If you’ve turned on a campaign and you’re getting 0 impressions or 0% conversions, listen up. In this week’s episode, the experts talk about some common mistakes that people make when setting up a Facebook ad campaign. They walk you through 11 things that you can check and fix to get your campaign converting again.

IN THIS EPISODE YOU’LL LEARN:

  • How to prevent the Facebook ad mistakes that even the experts make sometimes
  • The 1 thing you should do so that your disapproved or pending ad gets approved by Facebook
  • Why a limited ad flight schedule might not be right for you (and what to do instead)
  • 2 ways your pixel could be sabotaging you (and a Chrome extension to help you fix it)

LINKS AND RESOURCES MENTIONED IN THIS EPISODE:

Episode 54: 4 Facebook Ad Troubleshooting Tactics to Improve Conversions
Episode 144: Why This is Still the Best Time to Be a Facebook Marketer (Plus… Insights from Facebook’s NYC Office)
Chrome Extensions
Setting Your Spending Limit
Ads Not Approved?
Ads Pending Review
Improving Your Pixel’s Performance
Tier 11

Thanks so much for joining us this week. Want to subscribe to Perpetual Traffic? Have some feedback you’d like to share? Connect with us on iTunes and leave us a review!

iTunes not your thing? Find us on Stitcher.

The post Episode 160: Not Getting Conversions with Facebook Ads? Follow These 11 Steps appeared first on DigitalMarketer.


from Episode 160: Not Getting Conversions with Facebook Ads? Follow These 11 Steps

Everything You Need to Know About Inserting and Editing Images in WordPress

The post Everything You Need to Know About Inserting and Editing Images in WordPress appeared first on ProBlogger.

Do you feel confident using images in your blog posts?

While there’s no absolute rule that bloggers need to include images, most bloggers will include at least one eye-catching image in each post (normally at or very near the start).

However, it’s easy to make mistakes with images. We’ve already covered how to obtain images legally so you don’t accidentally infringe on someone’s copyright. But in today’s post, I want to go through the process of uploading and inserting images.

Whether you’ve just started blogging or you’ve been blogging for years, I hope you’ll learn something new from today’s post. We’re going to start off with the basics, and move on to some more advanced tips and tricks.

He are the ten things we’re going to cover:

  1. How to download an image from the web
  2. How to upload an image to your blog
  3. How to insert an image into your post
  4. How to align your image within your post
  5. How to resize your image
  6. How to turn your image into a link
  7. How to add alt text to your image
  8. How to edit your image in WordPress itself
  9. How to keep your image file sizes low
  10. How to optimise images for retina screens

#1: How to Download an Image from the Web

Brand new bloggers might feel a bit stuck at the first hurdle: downloading their chosen image.

Once you’ve found an image you can legally use, you’ll need to download it to your computer. (While it’s technically possible to insert it in your post using its existing URL on the web, this “hotlinking” is a bad idea. Many sites don’t like it, as it puts extra strain on their servers. And if the image file is removed from its current location, it’ll disappear from your post too.)

To download an image, right-click on it. You should see an option such as “Save image as…”. (It may be worded slightly differently depending on your browser.)

Download image

Click on “Save image as…”, and then select the folder on your computer where you want to save it.

On sites that act as a library of images (such as Pixabay and Flickr), you’ll normally be able to choose from different sizes for the image. Here’s how it looks on Pixabay.

Select image resolution

The numbers on the left are the dimensions of each image in pixels (width by height). The numbers on the right are the size of each image file in kB/MB. As you can see, larger images equal much larger files.

It’s up to you what size you choose. (We’ll cover this in more detail in sections #9 and #10 on this list.) Note that on Pixabay you need to create a (free) account to download the largest images.

#2: How to Upload an Image to Your Blog

After you’ve selected and downloaded an image, you need to upload it to your blog.

On WordPress, log in to your dashboard, open up your chosen post (or start a new one), and click the “Add Media” button.

Add Media button

Then click the “Upload Files” tab. You can either drag and drop your chosen file to upload it to your blog, or click the “Select Files” button to browse through your computer folders for it.

(Note that whichever you choose, the original file will remain on your computer. Only a copy of it is uploaded.)

If you want to, you can upload several images at once.

#3: How to Insert an Image

First, position your cursor where you want to put the image within your post. (Click at the start or end of a line of text, or click on a blank line.)

Your uploaded images be available in your media library. Click “Add Media” then the “Media Library” tab (if it’s not already selected for you) and you’ll see them.

Insert image

To insert an image, click on it and you’ll see this panel on the right-hand side of your screen.

Attachment details

You can set the alignment of the image, add a link, and choose the size you want it to be displayed. We’ll be covering all of these later on in this post. (You can edit your image to change any of these details after inserting it.)

Click “Insert into post” to place the image in your post where your cursor is.

#4: How to Align Your Image Within Your Post

If you inserted your image without changing the alignment setting, it may not appear exactly the way you wanted. Perhaps you intended to have it above your text, centred, or at the start of your post. But instead it’s right-aligned alongside the text.

Change alignment of image

(Dummy text generated by fillerama on “Doctor Who” mode.)

To re-align your image, click on it and then click the “align center” button on the mini-menu that pops up.

Align Center Button

(You can also click the little pencil button to edit the image, where you can select the alignment, size and more.)

Your image should now be aligned correctly in your post.

#5: How to Resize Your Image

If your image is too big, you can resize it by clicking on it and then clicking on the edit button in the mini-menu.

You’ll see details about the image. Click the dropdown menu next to “Size” and you’ll see a range of options.

Resize image

If one of the listed sizes works for you, select it. If not, click “Custom Size” and enter a width or height for your image in pixels. Whichever you choose, the other dimension will be adjusted automatically.

Click the “Update” button at the bottom of the screen, and you’ll be returned to your post with the image updated to your chosen size.

Note that this process doesn’t change the size of your original uploaded image, so the file size will remain the same. (We’ll cover more on this later in this post.)

#6: How to Turn Your Image into a Link

At some point you’ll almost certainly want to create an image that readers can click on to go to a different page.

For instance, you might want to create:

  • A “start here” page showing the featured image from several posts, with each image linking to the appropriate post
  • A page of book reviews, with the cover image for each book linking to the book on Amazon
  • A custom “buy” button for your products, with each one linking to a PayPal or shopping cart page

To add a link to your image, click on the image and then click the little “edit” button that appears to get the Image Details screen.

Click the “Link To” dropdown and select “Custom URL”. You can then enter whatever URL you want the image to link to.

Add link to image

Make sure you click the “Update” button to save your changes to the image.

An even quicker way to add a link to an image is to copy your link, then click on the image and paste the link (press Ctrl+V on a PC or Command+V on a Mac). This will automatically add the link to the image.

#7: How to Add Alt Text to Your Image

Alt (alternative) text is normally used for accessibility. It provides a short description of your image that can be read to people using screen-reading software. (It will also appear on the screen as text if the image fails to load.)

Note that this is different from a caption. If you enter a caption, it w’ll be displayed immediately beneath the image in your post.

You can add alt text to your image when you’re editing it. Simply fill in the Alternative Text field with whatever text you want.

Add alt text to image

#8: How to Edit Your Image in WordPress Itself

It’s normally best to edit images before you upload them using software such as Photoshop (or, if you want a free alternative, Gimp or Paint.NET).

But sometimes you might want to make adjustments to your original image within WordPress. You can do this by clicking the “Edit Original” button in the Image Details panel.

You’ll then see this screen.

Edit original image

You can then resize the image. (You can only scale down, not up.)

Note: it’s best to do this before making any other edits.

You can also rotate the image, or flip it from top to bottom or left to right, using the buttons immediately above it.

You can crop the image by clicking on it and dragging to select your chosen area. Here’s the original image flipped left to right, with an area selected so it can be cropped.

Crop image

To crop the image, you then need to click the “crop” button on the top left above the image.

Once you’re happy with your changes to your image, click “Save” beneath it, then “Update” on the next screen. You should now see your new image in the post itself.

If anything goes wrong, you can restore your original image using the “Restore Original Image” option.

Restore original image

#9: How to Keep Your Image File Sizes Low

The larger your image files, the longer they’ll take to load on your web page. And this can potentially affect on your site’s performance. If your site is really slow to load, readers may simply give up and go elsewhere.

There are several ways you can keep file sizes down, including:

  • Using .jpg images where possible. They’re compressed, so they aren’t as high quality as other file types. But for images in regular blog posts, they’ll probably look fine. Note that if you have transparent (or partially transparent) images, though, you can’t save them in .jpg format.
  • Resizing your image before uploading it to WordPress. If you’ve taken a photo on your camera and it’s 4000px wide, don’t upload it unedited to your blog. Yes, you can scale it down in your post (see #5), but the image will still take a long time to load. Instead, use image editing software to resize the photo before you upload it into your media library.
  • Using the WordPress plugin Smush to resize and optimise images you’ve already uploaded in the past. This could make your site significantly faster.
  • Using the TinyPNG service and/or Compress JPEG and PNG images plugin to reduce the size of your .png images. (If you have partially transparent images, they’re probably .png files. You should also use .png for any files with graphics in them.)

#10: How to Optimise Images for Retina Screens

The newest Apple products have Retina displays, which have a higher pixel-per-inch density than regular screens.

As SitePoint explains:

Retina has four times more pixels than standard screens. If you have a 400 x 300 image (120,000 pixels), you’d need to use an 800 x 600 alternative (480,000 pixels) to render it well on a high-density display.

This means that if you want a 500px by 330px image for your post, it would be best to upload it as a 1000px by 660px image. That way, it can be displayed crisply on the retina screen.

Your theme might automatically size and display the image correctly for each user (based on their device) if you simply insert it into the post at the larger size. If it doesn’t, you can use the WP Retina 2x plugin (which is explained in detail by Barn2 Media) to create and show the retina images as appropriate.

I know there’s been a lot to take in with this post. Don’t worry: you don’t have to master everything at once.

If you’re new to blogging, you might simply want to get confident with the basics of downloading and uploading images to your blog, then inserting them into your post at the appropriate point.

But if you’ve been blogging for quite a while, you’ve hopefully picked up a new tip or trick today as well. How will you put it into practice this week?

The post Everything You Need to Know About Inserting and Editing Images in WordPress appeared first on ProBlogger.


from Everything You Need to Know About Inserting and Editing Images in WordPress

Are You Effective or Just Busy? (FS278)

Are you always busy? Are you worried about how effective all this work is? Are you addicted to busyness and need help?

We are here to help you separate the needless hustle from the essential work. It is not always about working smarter than harder, but it is vitally important that you stop chasing your tail and working up a sweat while not making enough progress.

In this episode we talk about to do lists, goal setting, productivity and all the common grounds for growth measurement. A large part of the conversation is spent drawing out the intricacies of these relationships and how you can find your perfect balance of needs, ambitions and obligations to set your ideal goals.

We also talk about affirmation, journalling, reducing attachment and much more so be sure to tune in a get it all in this massive episode!

Subscribe (how to)   iTunes   Overcast   Pocket Casts   Stitcher   Google Play   RSS  

Key Points From This Episode:

  • Choosing the right things from your to do list. [0:04:01.2]
  • Effectiveness often includes busyness. [0:05:32.1]
  • Reasons why we have methods and practices around productivity. [0:07:02.4]
  • Winging it, freedom and the converse of over-organized systems. [0:09:57.2]
  • Over-dedication to the to do list and a lack of perspective. [0:13:17.2]
  • The Four Tendencies and using your own disposition to your advantage. [0:17:29.8]
  • Learning to look out for yourself as an entrepreneur. [0:22:19.5]
  • Prioritizing and managing your to do list according to growth and intuition. [0:25:11.3]
  • How Chase manages his tendency to wing his way through work. [0:29:50.4]
  • Relating your spiritual, emotional and professional goals. [0:39:01.2]
  • The usefulness of journalling and affirmation in maintaining real goals. [0:42:57.1]
  • Rolling with things as they come, all the way to a platform. [0:49:04.7]
  • Exploring growth through the tension between our dreams and obligations. [0:53:24.9]
  • Reducing damaging attachment to results. [0:56:02.2]
  • Where to start when getting going on your goals. [1:02:32.7]
  • And much more!

Links Mentioned in Today’s Episode:


from Are You Effective or Just Busy? (FS278)

Monday, July 30, 2018

Top 10 Tips for Conducting an Exceptional Interview—UPDATED!

In this blog post, I share my top 10 tips for conducting an exceptional interview for your podcast, your YouTube channel, and your website. You’ll learn:

  • The benefits of interviews
  • How to serve your audience with your interviews
  • What homework you need to do pre-interview
  • The types of questions open-ended and follow-up questions to ask your interviewee
  • How to create a warm, welcoming interview environment
  • Ways to give space and opportunity to your interviewee
  • The importance of listening
  • Why you should emphasize understanding
  • The tools to use for high-quality production
  • What you should never do in an interview
  • And how to have a little fun too

Ready for your interview prep? Let’s do this.
One of the best ways to create content online is to interview someone—a person who complements you and your brand or someone who fills the holes in it.

Interviews are extremely beneficial because:

  1. You can generate unique and refreshing content for your audience. You don’t need to be the expert to deliver expert advice.
  2. It can raise your level of authority simply because of the public association that you have with the interviewee.
  3. You build a relationship with the person you are interviewing which could possibly lead to other growth opportunities for you and your brand down the road.

Conducting interviews (especially audio or video interviews), however, is not easy.

At least good ones that are worth people’s time.

Although most of the content is generated by the person you are interviewing, most of the responsibility to fashion an interview worth consuming still lies in your hands—and it’s not just about asking the right questions either.

It’s about genuine interest, flow, vibe, sincerity, concern, digging deeper, defining the unclear, attracting stories, avoiding awkwardness, and being conscious about all of that at the same time.

After conducting hundreds of interviews of my own on the SPI Podcast and on my YouTube channel, and being interviewed on many podcasts and YouTube channels, I’ve learned a lot about what it takes to conduct a worth-listening-to interview, one that is captivating and full of content that your audience wants to hear.

It’s difficult to choose, but here are a few of my favorite interviews I’ve ever done:

Below are my top 10 tips for conducting an exceptional interview:

10. Remember Who You’re Serving

Two words: Your Audience.

Although the interview may help you and your brand while at the same time help the person you are interviewing (by giving them exposure to your audience) your number one priority should be to enlighten your audience—to get answers that are meaningful from the person you’re interviewing that can better serve those who will eventually consume that content.

Your audience will appreciate it greatly, and serving your audience first is a gesture of appreciation. Believe me.

9. Pre-Interview Homework

There are few things that you should do before the interview actually happens:

  1. Understand a little bit about who you’re interviewing first. Sure, you’re conducting an interview to learn more about a person and what they do, but as the interviewer you should know a little bit more than your audience so that you can properly introduce the person and ask the right questions. If you can find an existing interview with the person on another website, that will be helpful too so you can gauge their style and tone, and create questions for that person accordingly.
  2. Confirm the details of the interview with the person you’re interviewing. This is especially important if you’re interviewing someone in a different timezone. Some things to confirm are:
    • Date and time.
    • Method of communication. (Skype, phone call, smoke signals).
    • Approximate length of interview.
  3. Test your recording equipment! Microphone, audio, and Skype settings.
  4. Prepare a list of questions. See the next tip . . .

P.S. I share additional pre-interview tips including having a notebook with you and avoiding too much preparation in SPI TV Episode 50:

Subscribe to my YouTube Channel

8. Prepare a List of Flexible, Open-Ended Questions and Possible Follow-up Questions

You should prepare a list of questions that will act as a template for the interview—a guide for the path that you want to take from start to finish.

Not a shopping list that you should stick to 100 percent.

For each question you should come up with two or three possible follow-up questions that might be suitable to ask, depending on the answer.

You probably won’t get to them all, but because they are there it’s a good reminder just in case the perfect opportunity comes up to dig deeper into a topic of interest.

As far as the questions themselves, here are a few basic rules:

  1. Don’t ask YES or NO questions.
  2. Don’t ask more than one question at a time.
  3. Keep them relevant but be creative.
  4. Phrase the questions in a way that will allow the person being interviewed to expand.
  5. Offer to show the questions to the person you’re interviewing to make sure they’re comfortable with them, which goes along with . . .

7. Provide a Welcoming Environment

In order to get the best answers from the people you interview, you’ve got to create a welcoming environment for them.

A comfortable person, one who feels as if they are just having a conversation with a friend, will be more likely to give beefier information in a more enthusiastic and friendly tone, which benefits everyone.

Here are some ways to create a comfortable environment for the person you’re interviewing:

  • Let them know before you even start recording that it’s really just a conversation about two people connecting with each other.
  • Make sure they know all of the details about the interview beforehand.
  • Ask them if they’d like to see the questions first.
  • Thank them for the interview before you even start and welcome them to your audience.
  • Have them listen to a pre-written or rehearsed introduction before getting to the questions.
  • Be enthusiastic and actually want to conduct the interview!

6. Allow the Person You’re Interviewing to Talk

One of the worse things you can do as an interviewer is take over the interview yourself. You’ve got to give the person you’re interviewing a chance to communicate as much as possible without interruption. The more they talk—the better.

It’s important to engage in conversation—yes—but there’s a line you can cross where it starts to become rude and/or just not valuable to your audience.  Don’t interrupt. Remember, you are creating a space for them to share their story. It’s about them, and it’s about you facilitating that for them.

5. Listen!

This may sound obvious, but you’ve got to listen!

Be engaged in the interview—not just a person who reads the questions aloud.

This is much tougher than it sounds. As an interviewer myself, it’s extremely easy to “drift off” while the other person is talking. It’s not that you become bored and uninterested (I hope), but you might “tune out” while you wait for them to finish so you can move on to your next question. Don’t do that.

What helps is to not think of your interview as really an interview at all, but a conversation that doesn’t follow a linear path. Sometimes, in tangential side stories, gold can be discovered.

Always listen actively and be engaged and present.

4. Actually Want to Understand

Along the same lines, you must want to understand—and this can be done on different levels.

On the surface, it’s just about understanding the situation or what’s happening. What did this person do and why is it important to share?

On a deeper level, however, it becomes much more interesting, both for you as the interviewer and those who will eventually listen to it. On the deeper level, it becomes why does this person do what they do, and how.

Pro interviewers like Andrew Warner from Mixergy and David Siteman Garland from The Rise to the Top do a fantastic job of actually wanting to learn everything there is to learn about a person or a process—not just the what but also the how and why, and I genuinely feel like it’s because they want to fully understand everything, which is why their shows are so popular.

3. Strive for a High-Quality Production

Bad quality audio or video can ruin a fantastic interview. Some people won’t even listen if the quality isn’t there.

Do whatever possible (within your budget, of course) to conduct a high-quality interview.

I personally use a Heil PR-40 Microphone and conduct most of my interviews on Skype, even if the other person is on a telephone line (I pay $2.99 a month to be able to dial a landline).  I also like the ATR2100 microphone (USA) and Samson Q2U microphone (UK), both of which I recommend in my free How To Start a Podcast mini-class. [Disclaimer: The microphone links are affiliate links, which means I get paid a commission if you purchase through those links.]

I record using Ecamm Call Recorder for Skype (Mac only), although if you’re on a PC, Pamela for Skype is the software of choice.

Also, check out Auphonic, which is a free tool that makes sure both sides of the conversation are at the same level of volume.

If you want to add an extra oomph to your recording quality, check out my video:

Subscribe to my YouTube Channel

2. Never…

  • Ask a Yes or No question.
  • Ask more than one question at a time.
  • Say “…and my next question is…”
  • Allow for an awkward pause or dull moment.
  • Be disrespectful to your audience and the person you’re interviewing.
  • Forget to be present with the person you’re interviewing.
  • Rely too much on research or notes, as it takes away from your active listening.
  • Keep your mouth on your microphone (or breath into the mic) while the other person is talking.
  • Forget who you’re serving.

1. Have Fun!

I know it’s cliche to end a top 10 list with “have fun”—but in this case it will truly help your interview.

Having fun with it will actually make you and the person you’re interviewing much more comfortable, which will lead to better content for your audience.

If you make it seem like a task or a chore, then it will reflect in the interview—and that’s not what we want.

Have fun, enjoy the experience, develop new relationships, and generate some amazing content!

Ask the Readers: What Makes an Interview Exceptional to You?

Now it’s your turn.

As a consumer of content please share your thoughts in the comment section about the following question:

What makes an interview exceptional and makes an interview terrible?

Here’s what some people already have to say about it on the SPI Facebook Page:

Jennylou Raya says:

Exceptional is when they show genuine interest in the person, asks questions no one asks but others would be dying to know. Good is consistency from one interview to another without sounding like a broken record when you have a chance to listen to the interview archives all in one day. Terrible is when the interviewer is unprepared and has no clue who they are talking to or knows less than the audience.

Jason Bellomy says:

The main thing for me is that the person conducting the interview does not dominate the conversation. The goal should be to let the interviewee do most of the talking while the interviewer pushes the conversation in a direction where he feels his listening audience would benefit.

Brandon Figueroa says:

Exceptional: the interview is incredibly informative. Meaning, the they ask lots of ‘meaty’ questions (and none of that basic boring stuff) with lots of answers and perspectives that most people haven’t thought of or seen before.

Terrible: Poor audio quality, no one cracks a joke, monotone, uptight, uninformative, repetitive stuff that people already know.

Awesome Interview (Bonus): it’s ‘shareable’. Extremely entertaining AND informative at the same time…

Now—how about you?

P.S. I have ongoing webinars on Podcasting the Smart Way, Affiliate Marketing, and others all available for free! Sign up for the latest webinar today!


from Top 10 Tips for Conducting an Exceptional Interview—UPDATED!

#1630 Why you want to see users wincing at your site

I can’t tell when someone is wincing when their looking over my website. I can’t tell because I’m not there with them. Today’s guest created a set of tools that allows websites to understand how a user is experiencing the page. He encountered a few failures before finally getting it right with his current business. We’ll find out about that and so much more in this interview. David Darmanin is the founder of Hotjar analytics and feedback tools that allow you to see how your site is being used.

David Darmanin is the founder of Hotjar analytics and feedback tools that allow you to see how your site is being used.

Sponsored by

trouble finding developers, Toptal is a network of elite pre-vetted software developers. You tell Toptal what you’re looking for, they search their network for the best people, they test the candidates, and then they present you with only the candidates who meet your individual needs. Once you pick someone you can start work with them the next day. They offer a no-risk trial period. Go to Toptal.com. Get the best of the best right now.


HostGator – Ready to take your website to the next level? Whether you’re a first-time blogger or an experienced web pro, HostGator has all the tools you need to create a great-looking website or online store. A wide range of options includes cloud-based web hosting, reseller hosting, VPS hosting and dedicated servers. Founded in 2002, HostGator is the perfect web partner for business owners and individuals seeking hands-on support. Visit https://ift.tt/2HikPBw to see what HostGator can do for your website.

More interviews -> https://mixergy.com/moreint
Rate this interview -> https://mixergy.com/rateint


from #1630 Why you want to see users wincing at your site

Friday, July 27, 2018

#1629 The woman behind the soap you’re probably using

The beauty industrial complex has never spoken to me but I found a shampoo that I freaking love. I’ve been told when I interview founders I really admire, my questions can lose their edge and I don’t push as hard. I don’t want to do that today. Today’s guest is Susan Griffin-Black, the co-founder and Co-CEO of EO Products which is a collection of body and hair products made with active botanicals and pure essential oils.

Susan Griffin-Black is the co-founder and Co-CEO of EO Products which is a collection of body and hair products made with active botanicals and pure essential oils.

Sponsored by

Toptal – If you’re having trouble finding developers, Toptal is a network of elite pre-vetted software developers. You tell Toptal what you’re looking for, they search their network for the best people, they test the candidates, and then they present you with only the candidates who meet your individual needs. Once you pick someone you can start work with them the next day. They offer a no-risk trial period. Go to Toptal.com. Get the best of the best right now.


If you need anything designed–a new web page, a new landing page, a new logo, DesignCrowd will do it for you. They ask you what you’re looking for, who you are, what your company is like. They will give you lots of options, you pick the one you like, pay for it, and they guarantee results. It’s that simple. Find out how DesignCrowd is different than the other companies and go to designcrowd.com/mixergy.

More interviews -> https://mixergy.com/moreint
Rate this interview -> https://mixergy.com/rateint


from #1629 The woman behind the soap you’re probably using